1. Home
  2. Merchandise
  3. Create a Fixed Price Item

Create a Fixed Price Item

Contents

To create a fixed price item Click on the Merchandise tab on the left side bar. Then Click on the Create Merchandise Button.

Next, enter all the items details:

  • Item Display Name will be the name the customer sees
  • Item Name will be the name that shows in reporting
  • Select Fixed Price
  • Enter an expiration date
  • Choose if the item can only be purchased with a registration
  • Enter the item’s description

Note
If you select, the item must be purchased with a registration it will not show in the Event store in the case you have one. It will only be sold within registration, or within the “Shop Button” on the participant’s account where they have access to manage parts of their registration.

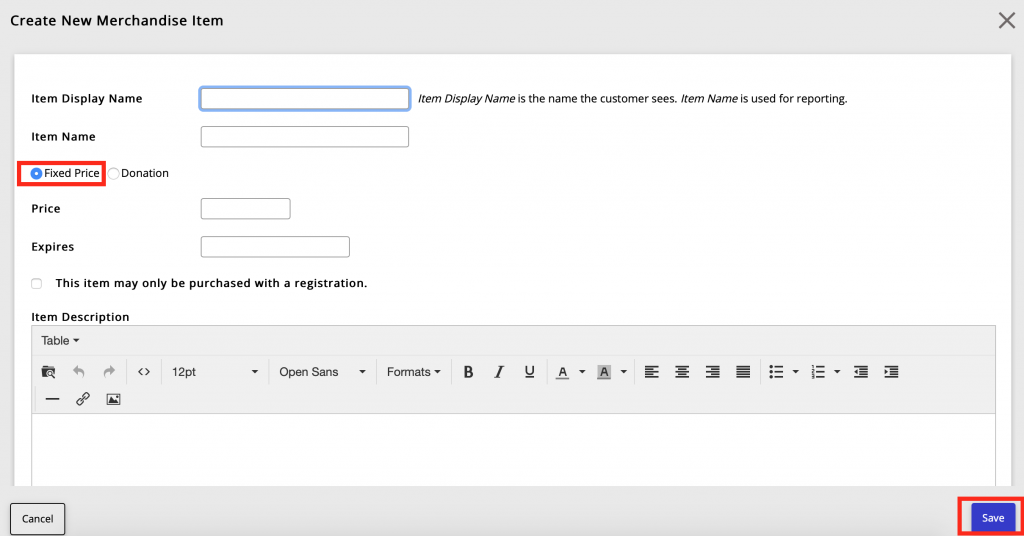
Click the Save Button in the bottom right of the screen.

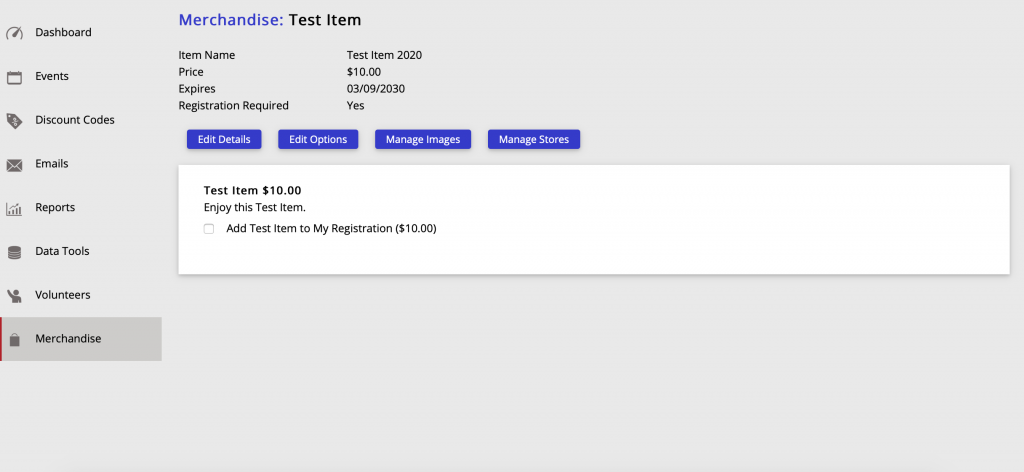
Example of what a fixed item looks like:

EventDog Pro Tip
To add options such as sizing, color, etc, see the Editing Merchandise article HERE.

Updated on March 10, 2020

Related Articles