To create a new check-in, Click on the Check-In Tools tab from the tool bar on the left hand side of your event director account.
Next, Select the Create New Check-In button in the upper right of the Check-In Tools screen.

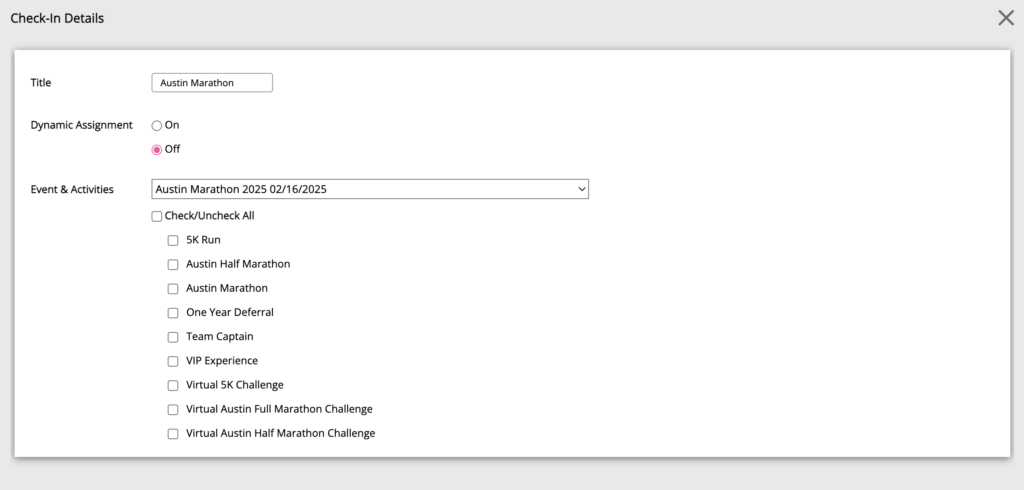
Set the Details
Here, you will enter in a title for your check-in system. This will only show on your event organizer account in your Check-In Tools list.
Next, you can select whether or not to have Dynamic Assignment (also called walk-up assignment), which is the process of assigning bibs when racers are checking-in instead of having pre-assigned bibs. Dynamic Assignment will pop-up the bib assignment modal as soon as the participant check-in is opened.
Now, Select what Event the check-in system is for, and what activities from the event will be included in check-in.
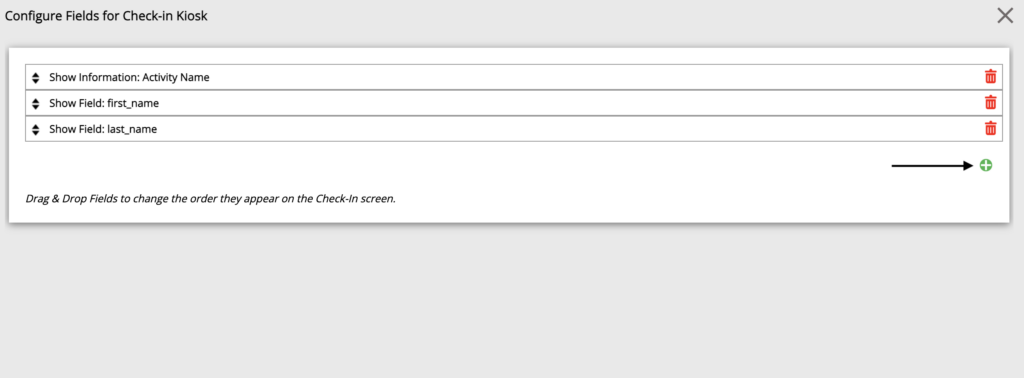
Configure Fields
Using the Choose Fields button on the check-in system manager you can select which fields you want to populate on the check-in kiosk.
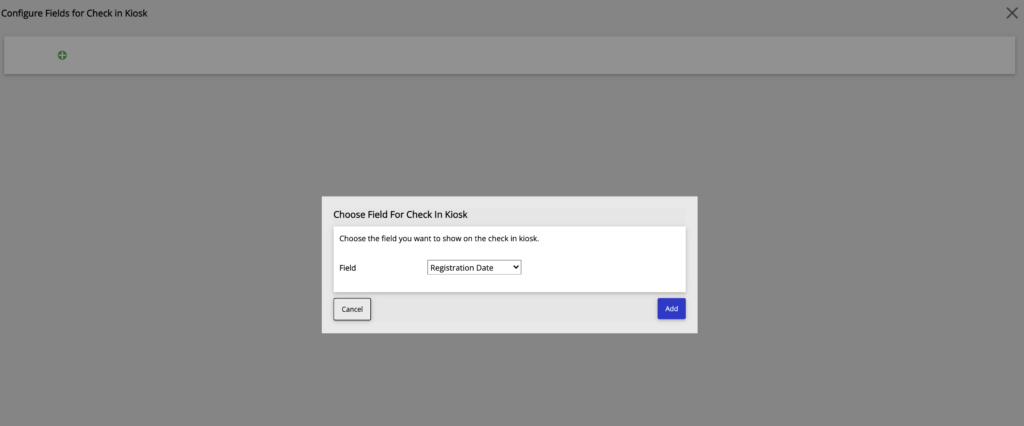
Click on Green arrow to Select a Field from the drop down list.
The following will show at the top of all check-in kiosk:
- Participant’s first and last name
- Activity they are registered for
- Payment status
You can add any common fields, registration question fields, generated fields, or merchandise.
Types of fields
- Common – Basic questions from the registration template
- Registration Questions – Any question from registration including custom questions
- Generated- Any field created using the field generator to tag data (ex. bib numbers)
- Merchandise- Any merchandise sold in the registration path
Registration question fields can be edited on the check-in screen as long as the kiosk user is an admin. Generated fields can be automatically or manually updated by kiosk users that are not admin.
In the check-in system manager, you will be able to view the fields you have added with a participant’s data on the lower left hand of the screen
Add Kiosk Users
In the check-in system manager, Click on the Kiosk Users button. This will take you to the kiosk user manager. Here Select the New Kiosk User button in the upper right hand corner.
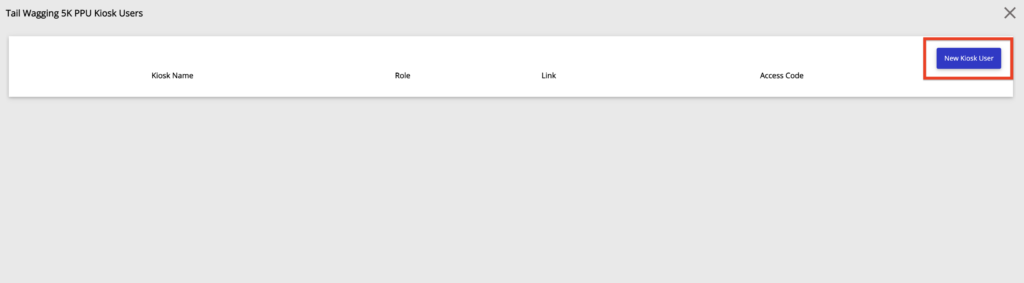
Name the kiosk and select a user role.
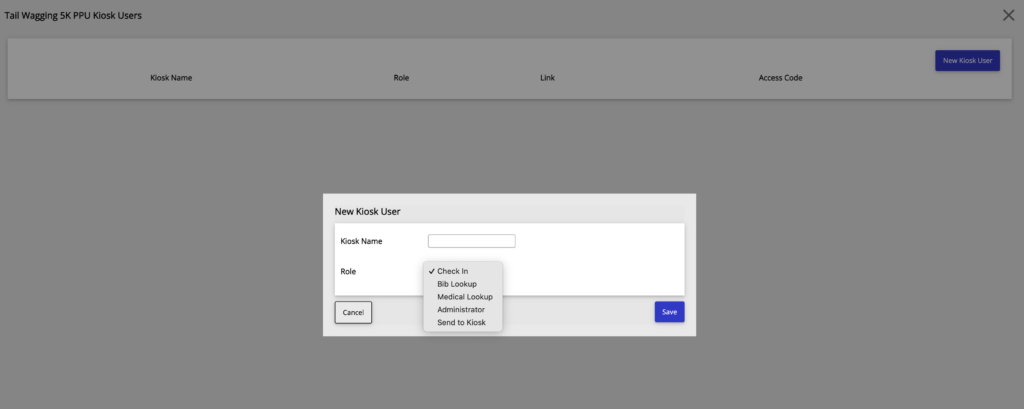
See more information on kiosk user roles HERE.
See more information on how to use the kiosk HERE.
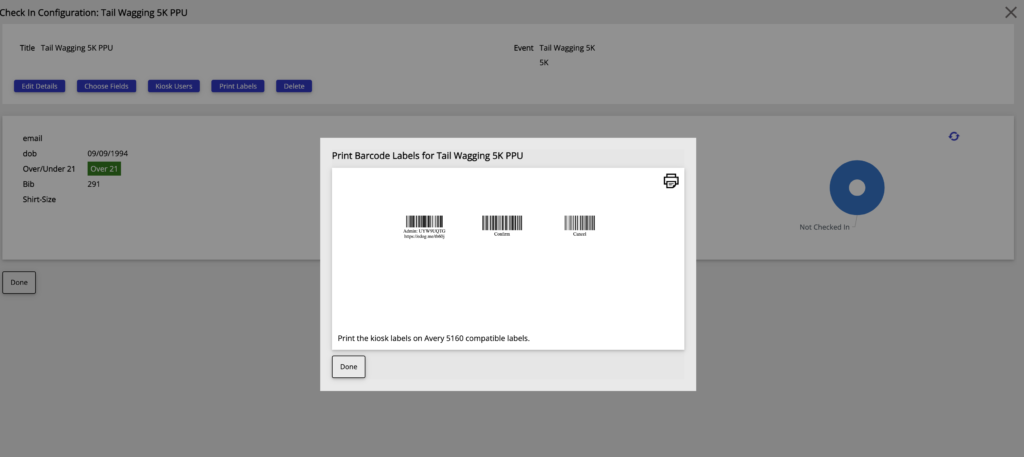
Print Labels
If you plan to use a scanner to help make check-in more efficient use the Print Labels button to print labels for each of your kiosk.
The labels have 3 barcodes:
- Login – Logs the kiosk back in if it gets logged out
- Confirm- Completes and marks the check-in
- Cancel- Cancels the current check-in screen, and takes you back to the main screen of the kiosk
Delete Check-In System
To delete a check-in system, Select the Delete button.
This will delete the system, but will not affect your data or any check-ins that have already occurred.