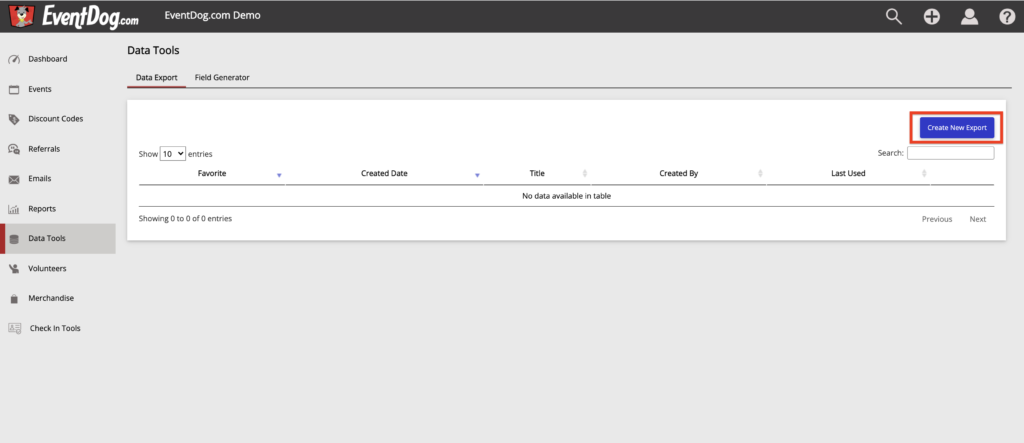
Select Data Tools from the left hand menu and Click on the Create New Export button. This will open the data export editor where you will create your custom export.
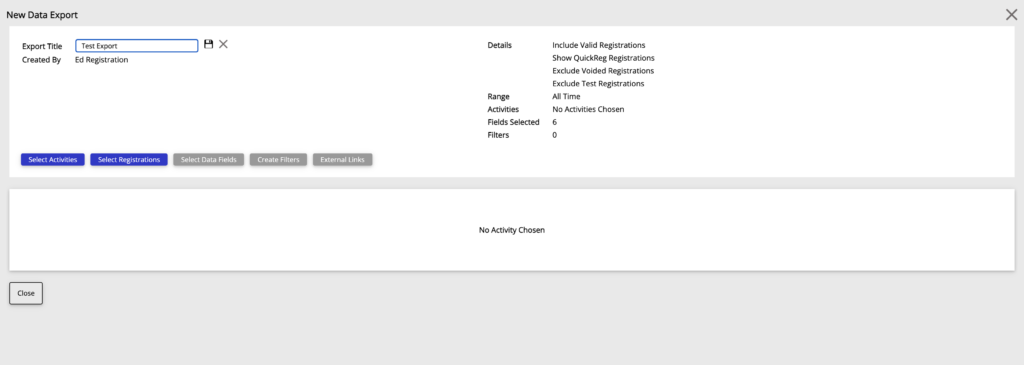
Overview of Steps
- Export Title
- Select Activities
- Select Registrations
- Select Data Fields
- Create Filters (optional)
- External Links (optional)
Export Title
Give you data export a title by entering text in the text box and Clicking the Save icon to the far right.
Select Activities
To select activities you will Select the Select Activities button. To add activities Select a Year and then Select an Event. All activities from the event will show in the Unselected Activities box. To add an activity to the Selected Activities box Click on the Activity. To take an activity out of the download, Click on the Activity in the Selected Activities box.
Selecting All of an Event’s Activities
You can add all or only specific activities from and event. To add all or unselect all activities from an event Click on the Event title in either the Unselected Activities or Selected Activities boxes.
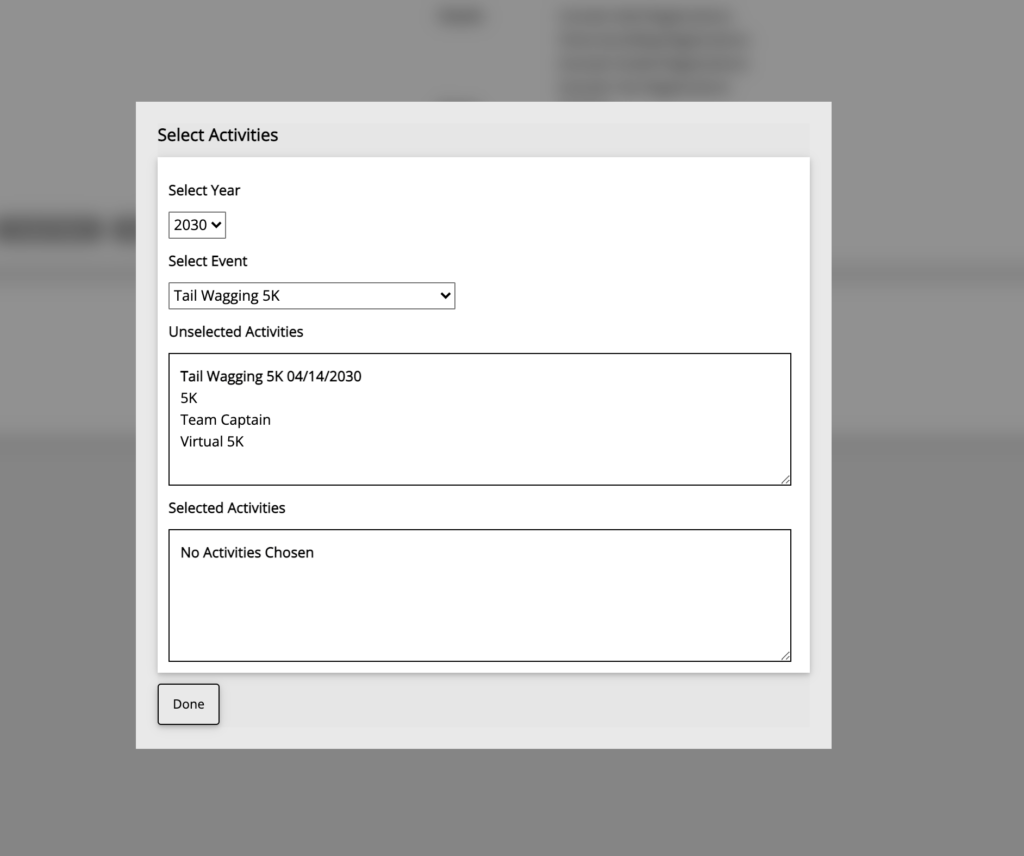
Adding Activities from Different Events or Different years
Data Export lets you add multiple events and activities. Events and activities can also be from multiple years. To add activities from different years use the year drop down to Select a new year and use the event menu drops down to Select another Event. Then Click on activities from the event to add to the export.
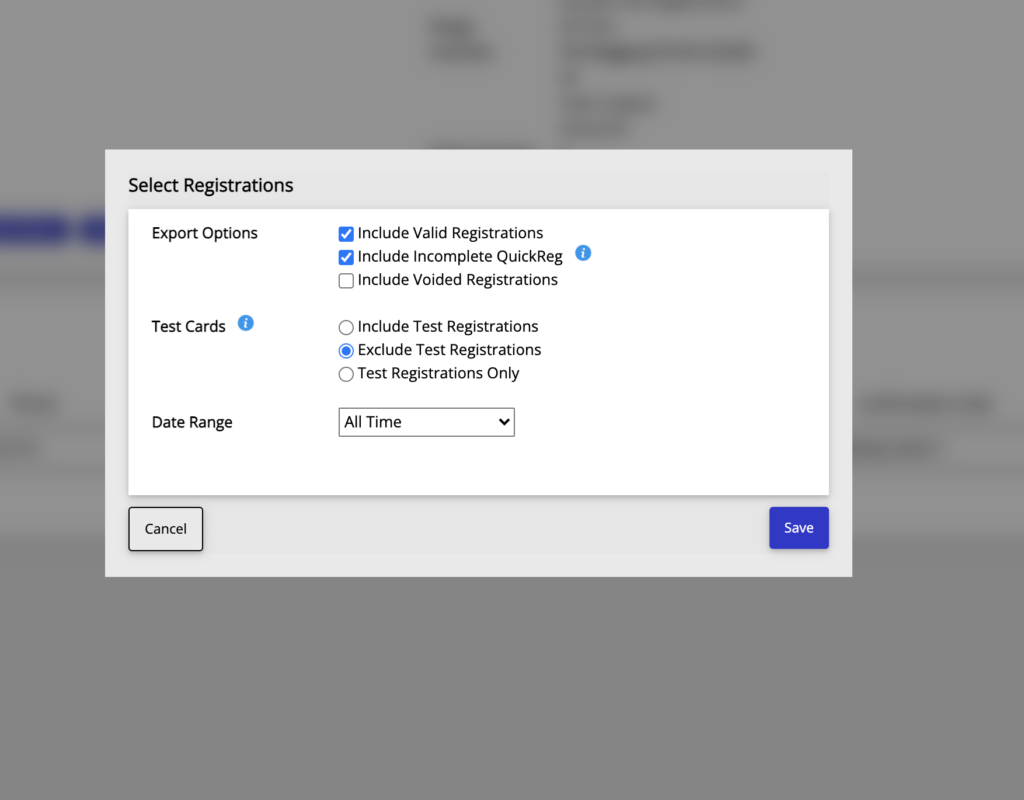
Select Registrations
Export Options
This series of checkboxes lets you decided what types of registrations you want to include in your data export. If you select all you can include all types. You can select any variation of the following to include in your export.
- Include Valid Registrations
- Include Incomplete QuickReg (More information on QuickReg HERE)
- Include Voided Reg
Test Cards
This allows you to decide if you want registrations made with the test card included in your download. Here you can only select one the following:
- Include Test Card Registrations
- Exclude Test Card Registrations
- Test Card Registrations Only
Date Range
The date range allows you to set a certain time period you want to export data from. Note, the All Time range will only show “all time” for the specific year of each event’s activities you have selected.
- All Time
- Yesterday
- Week to Date
- Last Week (Sun-Sat)
- Last Seven Days
- Month to Date
- Last Month
- Custom
*Once you have made your registration selections for the export Click Save.
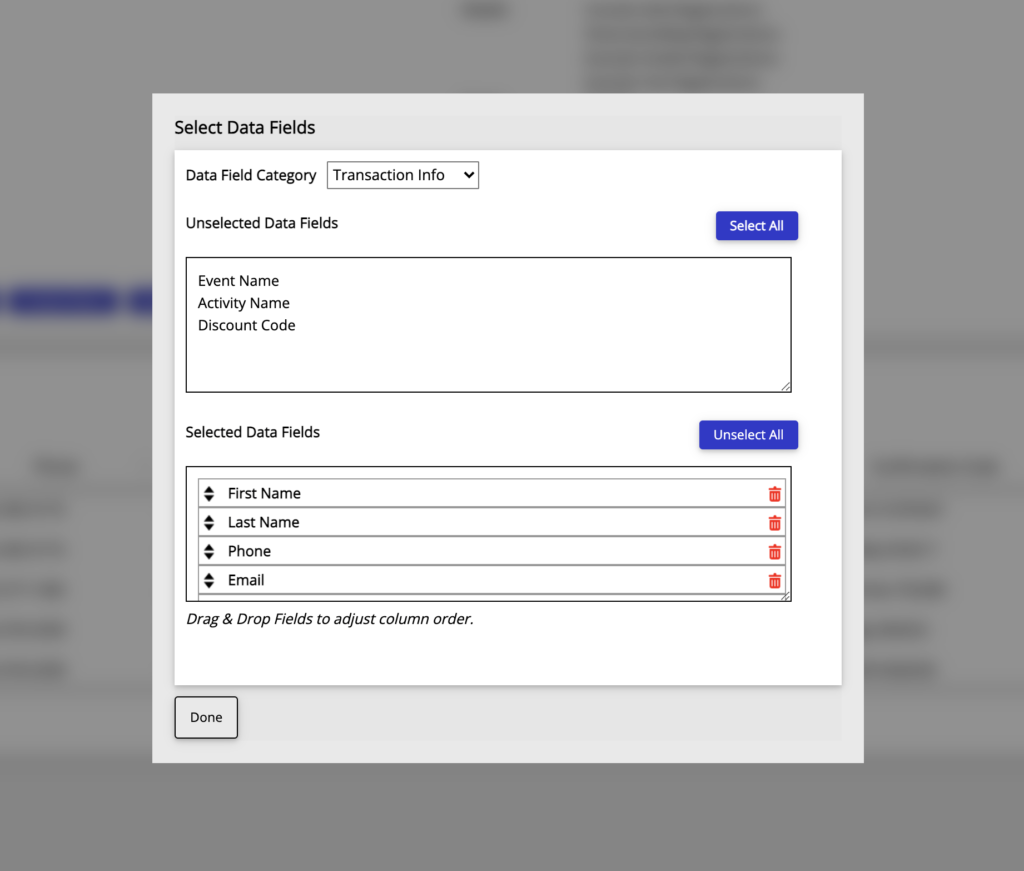
Select Data Fields
Data fields that can be added to the export include any data a participant entered during registration.
There are four different categories of data fields
- Transaction Info
- Any information regarding the actual transaction such as event, confirmation number, date, time, and discount code.
- Participant Info
- Any information that the participant would have entered in the registration path that was in the registration template at set up. For example: email, name, address, etc.
- Custom Questions
- Any custom questions created for your specific registration.
- Merchandise
- Any merchandise offered in the registration path will.
Once you pick a category to select from, you can select all data fields using the Select All button in the upper right above the Unselected Data Fields box, or you can select one by one. To unselect you can use the Unselect All button to the upper right above the Selected Data Fields box.
Arrange data fields
Before exporting you can use the arrows, or click and drag data fields, in the Selected Data Fields box, to arrange their order.
Create Filters
To further organize your data before export you can add filters to the data. Here you can add one or multiple filters.
Click on the Create Filters button, and then Select Add New Filter. Fill in the filter information and Click Save.
Filter options are based on questions asked during registration and what responses registrants gave.
External Links
External links allow you to share a data export via a link that will update anytime the link is reopened. This way current data can be shared without having to download and send a report. Anyone with the link can reload the link and have up to date data.
See more on external links HERE.