A merchandise item can be edited in the following categories: Edit Details, Edit Options, Manage Images and Manage Store.
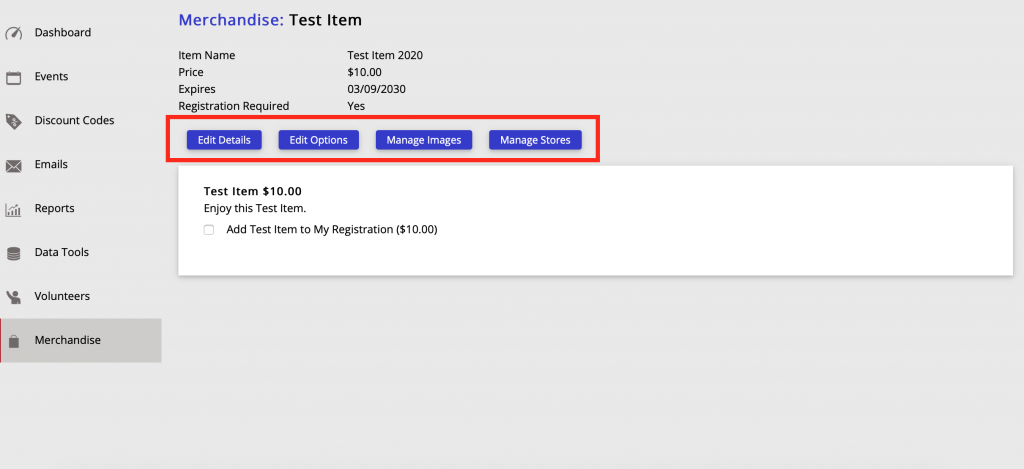
There a 2 ways to get to the item editing screen:
- If a new item is created, you will be taken to this screen automatically
- For already created items, Search for the item on the merchandise home screen. Then Click on the Item to edit or Select Edit on the Action Drop Down Menu
Once on the screen, select the editing button you wish to edit.
Edit Details
In the edit details section you will be able to change item display name, item name, update from a fixed price item to donation, expiration date, registration required option and item description.

Edit Options
In edit options you can create options for your merchandise item such size, color, etc. After you create the option, you will then have the ability to create the following that go with the option:
How to Create an Option
Here is a step by step of how to create an option. In this example, we are going to create the option of Size for a t-shirt:
Select the Editing Options Button on the editing Screen
Next, write what option you are creating in the Text Box at the bottom left of the screen. Then Click the Save File Icon.
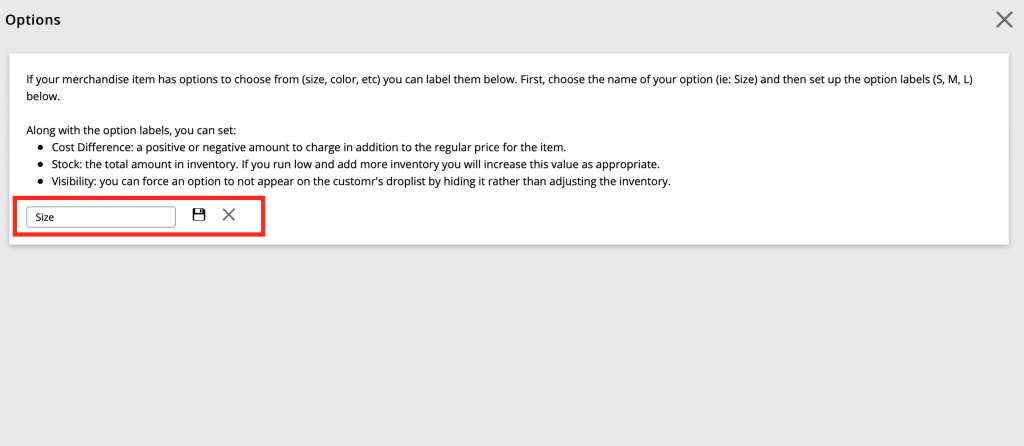
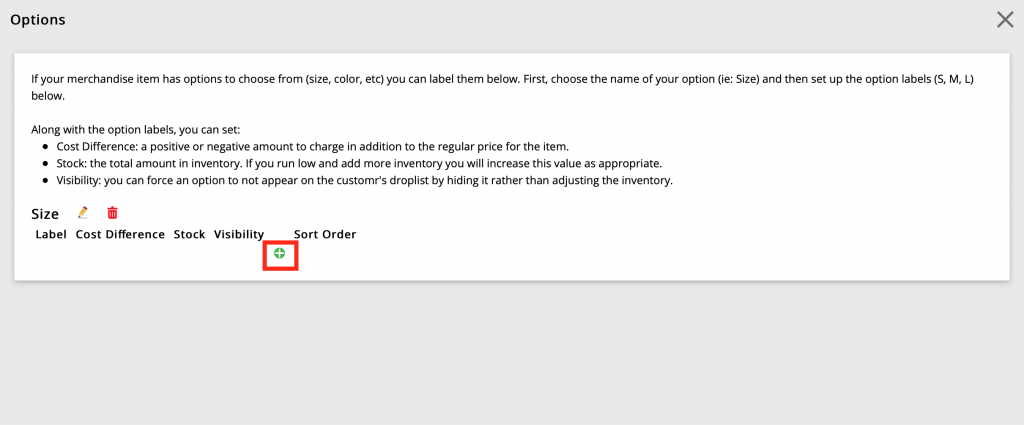
Now, Click on the Green Plus Button to enter in the corresponding option labels, cost difference (only if you have one and if you don’t leave it at $0.00), stock and visibility.
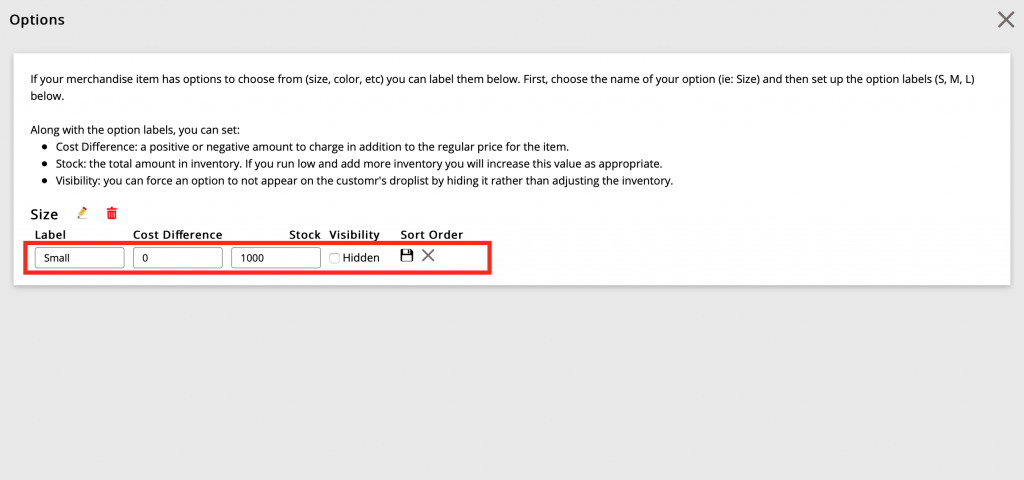
Then Click the Save File Icon. Continue this until you have entered all the option labels you need.
To go back and edit the Option you created or any Option Label Click on the Pencil Icon next to it. To delete Click on the Trash Can Icon.
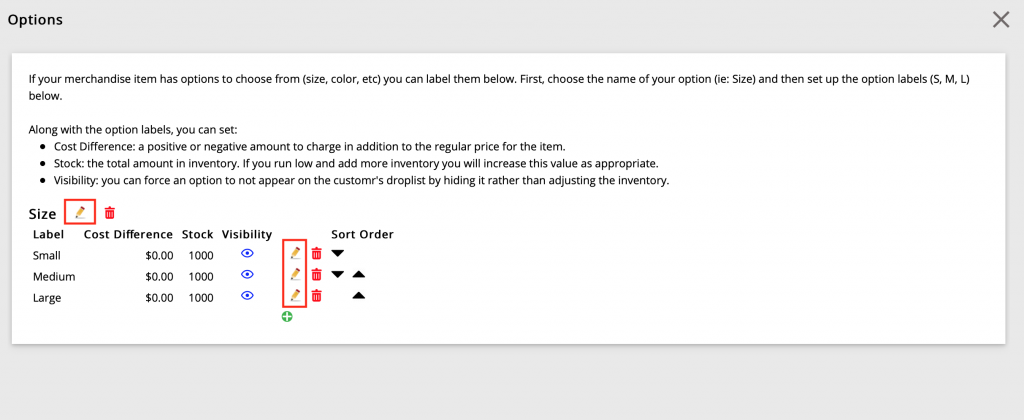
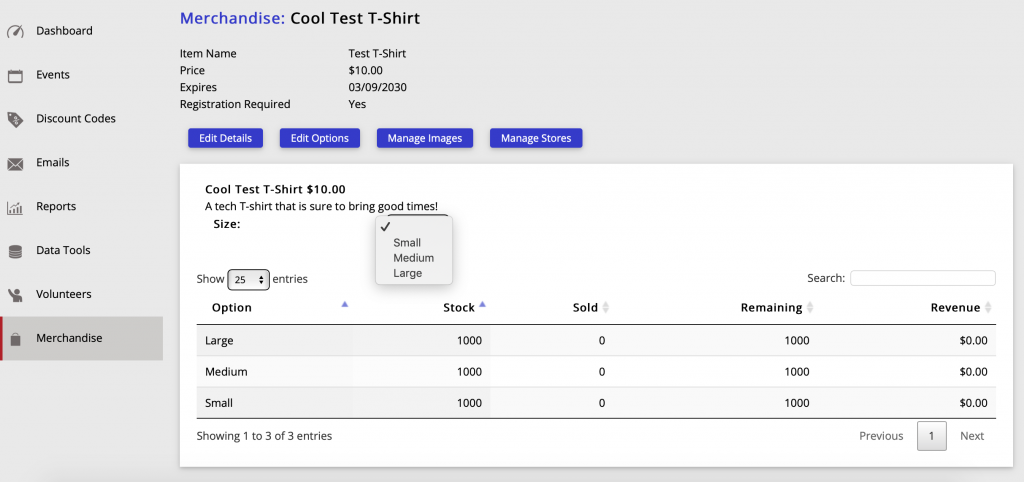
Once option and labels are in the item will appear like this:
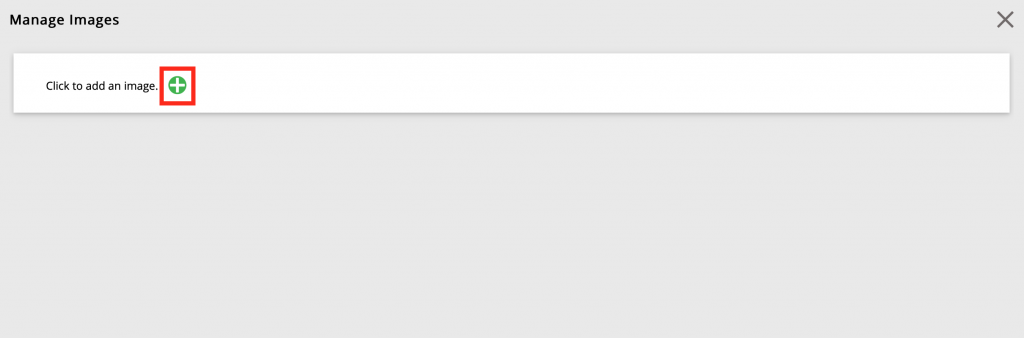
Managing Item Images
To add and manage item images Click on the Manage Images Button on the editing screen.
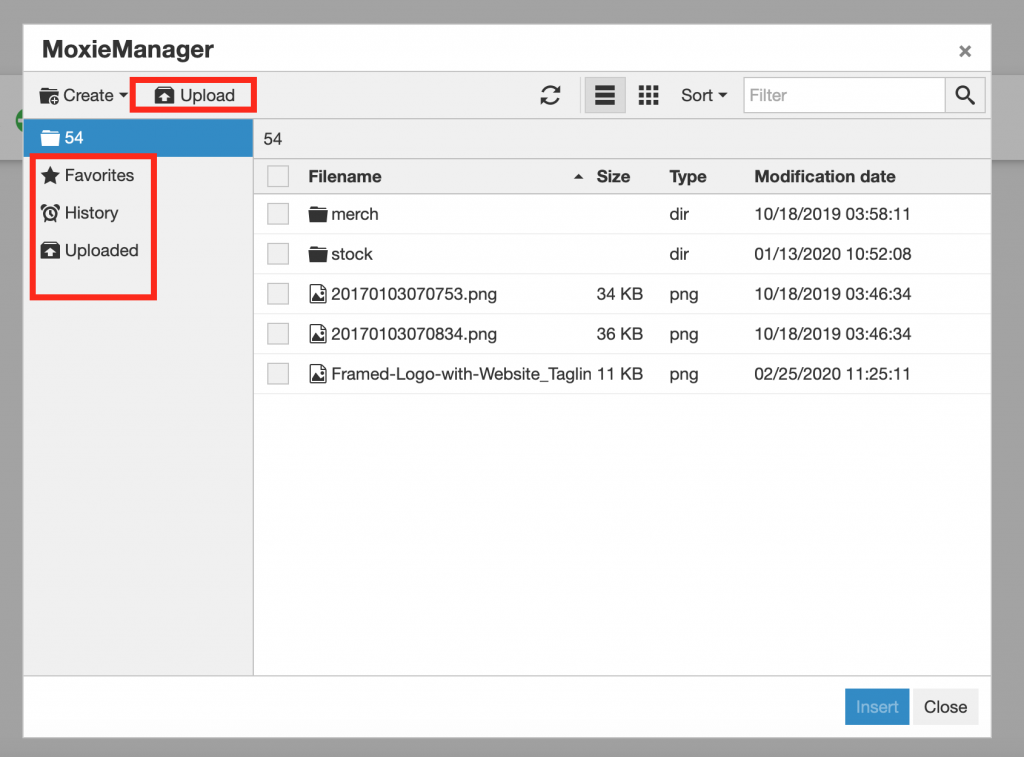
Here you can upload or select an image you already have uploaded/used in the past.
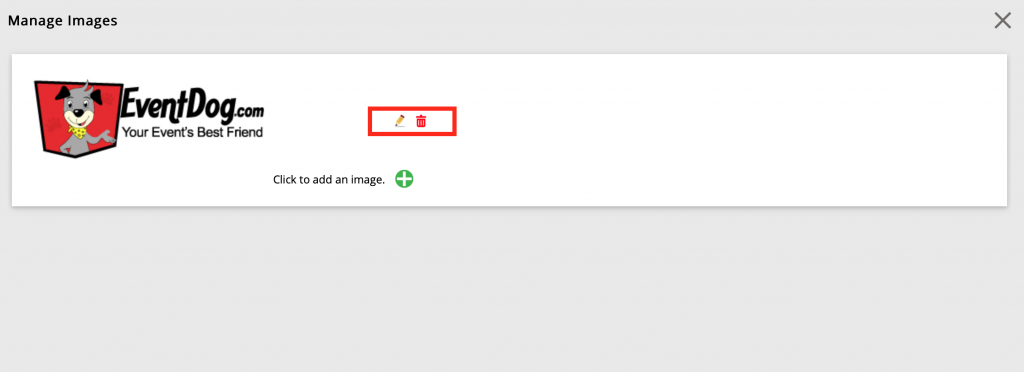
Next you can use our image editor to edit your image. To do this Click on the Pencil Icon next to the image. You can also delete an image.
Edit the image
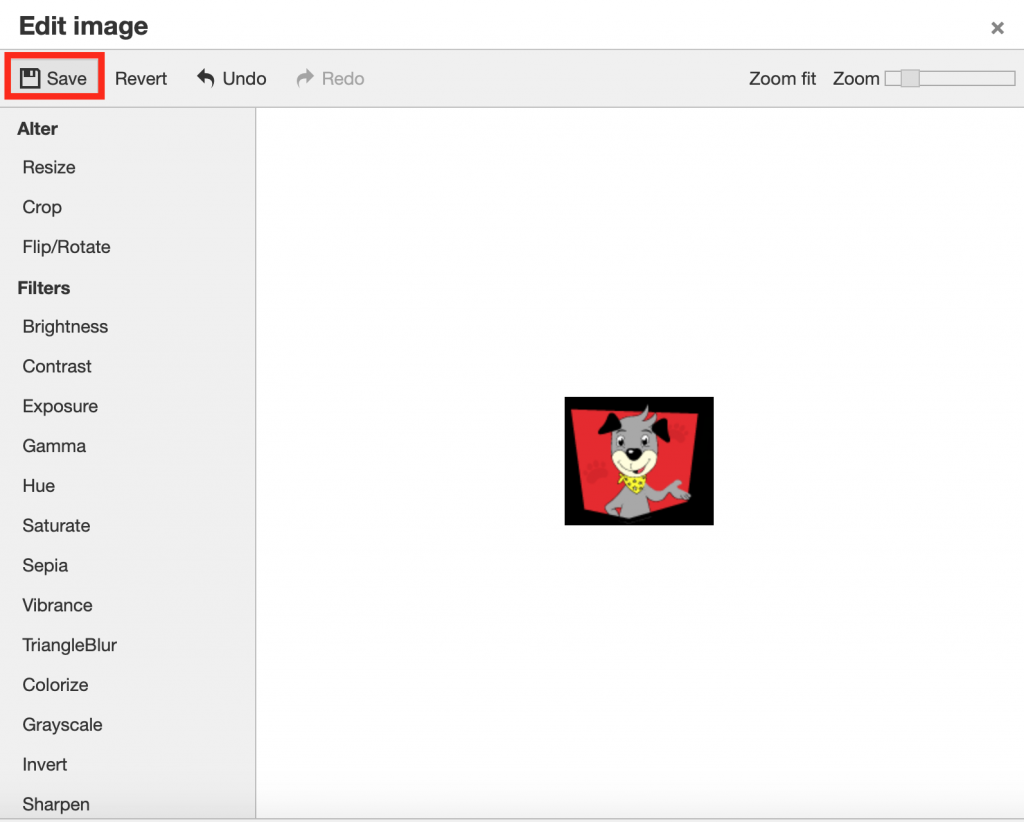
After making edits Click Save in the top left of the image editing screen.

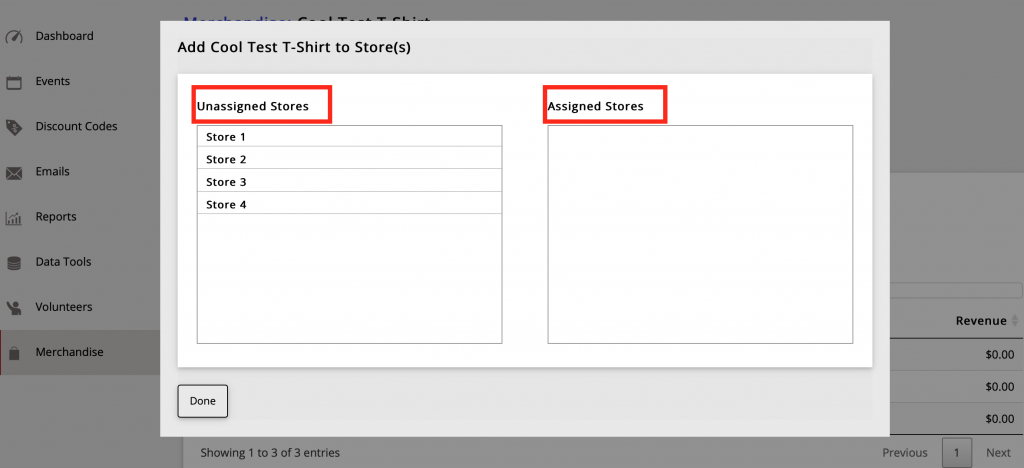
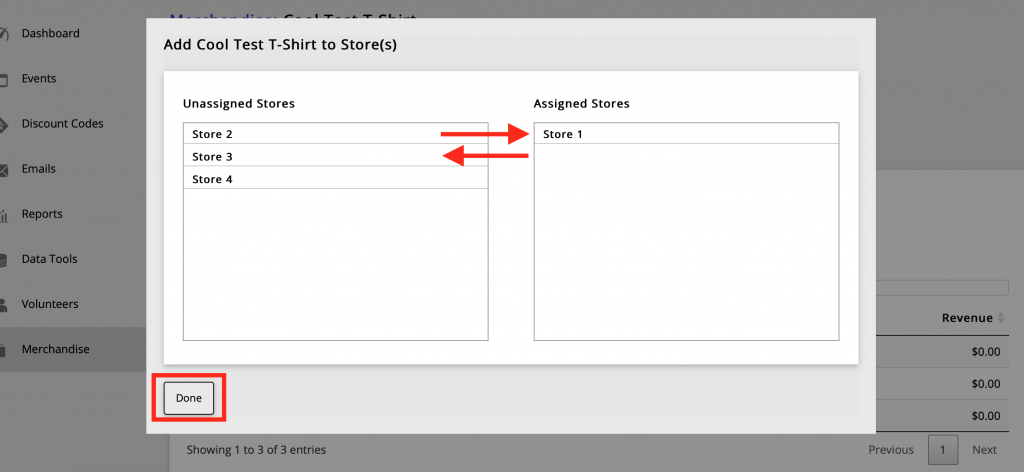
Manage Stores
You can add an item to a store by Clicking the Manage Stores Button.
Here you will see two columns, “Unassigned Stores” and “Assigned Stores”. You can Click on Stores from the Unassigned Stores column to the Assigned Stores column to add items to that store and vice versa. Once you have your stores assigned, Click Done.