To manage and use any of your kiosks, Click on the Kiosk User button in the check-in system manager. This will open the kiosk manager where you can add, edit, delete and get links for kiosks.
Opening a Kiosk
There are two ways to have kiosks open for check-ins: they can be opened using the link with the built-in access code, or by using the access code to login.
Opening a Kiosk with a Link
Here you can obtain a unique link with the access code built-in and the kiosk will automatically be logged in.
- Copy the unique link with the access code built in
- Open the link in a new window and paste the link
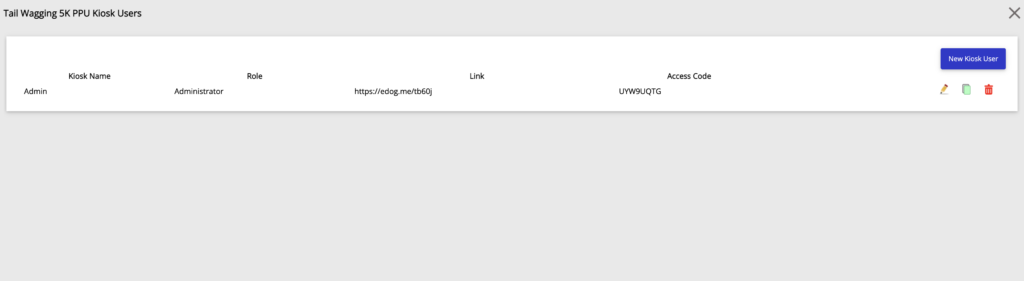
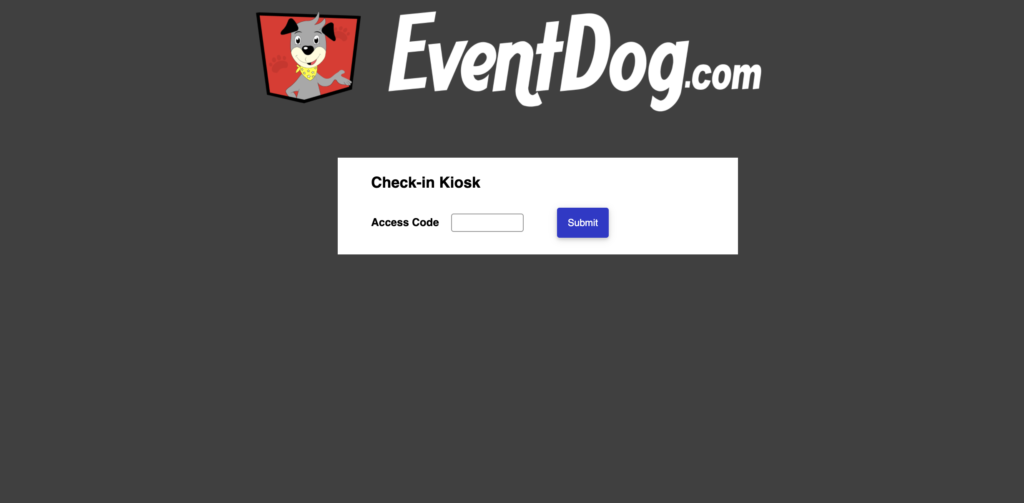
Opening a Kiosk with the Access Code
If you would like your check-in kiosk to be logged into:
- Copy the unique link with the access code built in
- Open the link in a new window and paste the link
- In the kiosk, Click Rectangle with Arrow button in the upper left hand corner
- This will take you to a enter access code screen
- From this screen your kiosk can be logged into by typing the access code or scanning it if you have scanners and printed labels
Checking In
Search Participant
- Once Kiosk open, enter the participant’s last name, first name, or bib number
- Click Search
- Search results of participants will show
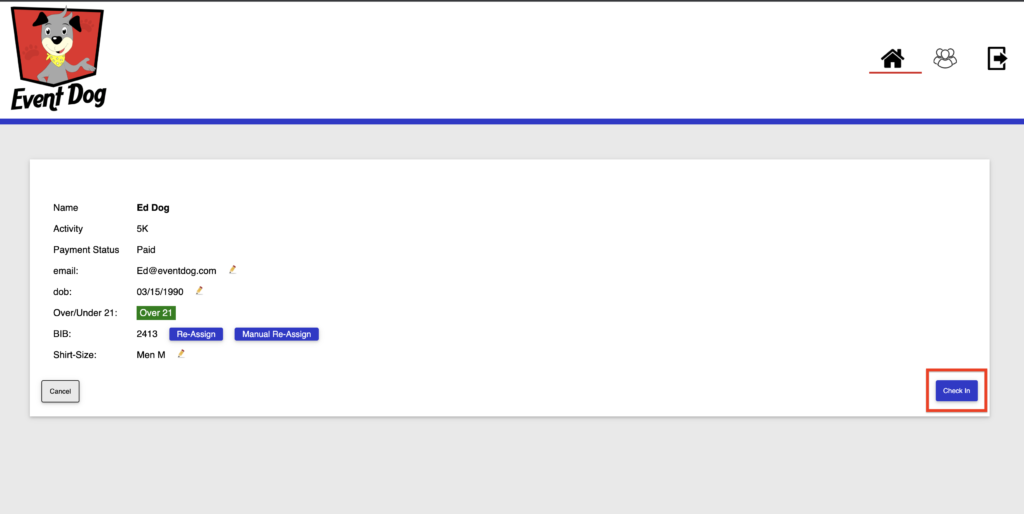
Edit Participant Info
A participants registration fields can be edited from the check-in screen if the check-in user is an administrator.
- After participant is searched for, Click on Registration
- Click on Pencil next to the registration field you would like to update
- In the pop-up window, make the Edit and Click Save
Reassign Bib Number
Once you have created a field generator for “Bib” you will be able to manually assign or dynamically assign bibs. This is all up to how you want to assign bib numbers.
Next to the bib field, Click Auto Assign or Manual Assign
- Auto Assign- brings the next bib number in the range you entered into the field generator
- Manual Assign- allows you to actually type or scan in the bib number
Complete Check -In
Finally, after the participant has been found and the information verified, it is time to complete the check-in.
- Click the Complete button in the lower right hand side of the check-in kiosk
- There will be a “Complete Check-In” that appears and fades on the screen
Remove Check-In
Check-ins can be removed.
- Search for participant
- Select the registration
- Click on the Remove button in the lower right hand corner of the kiosk
