In the store manager you can create a store, edit, copy or delete a store. Merchandise can be added to a store from the merchandise item editor or item quick editor pages.
Create a Store
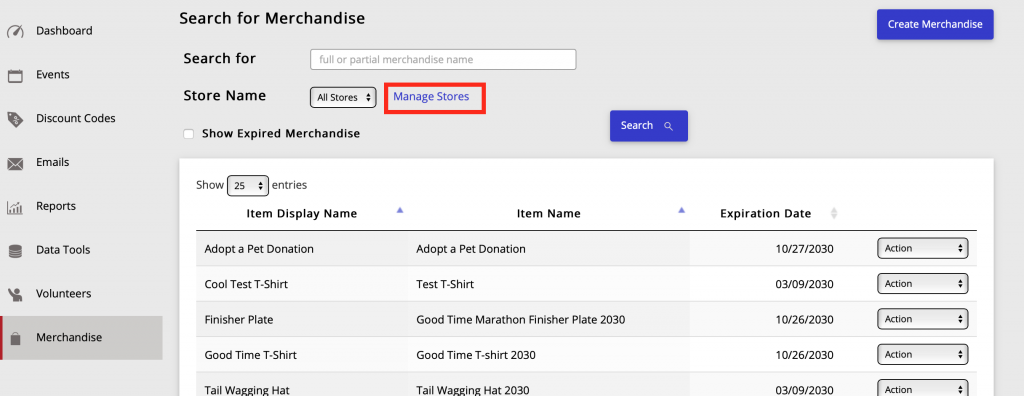
To create a new store, Click Manage Stores on the Merchandise home page.
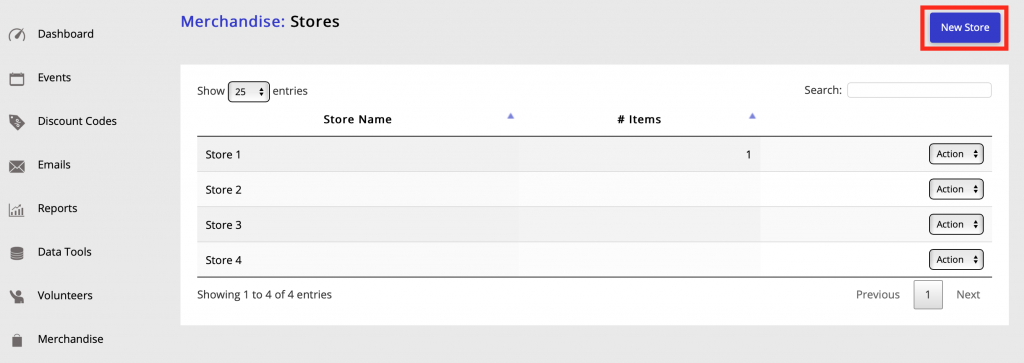
Next, Click on the New Store Button in the top right of the page
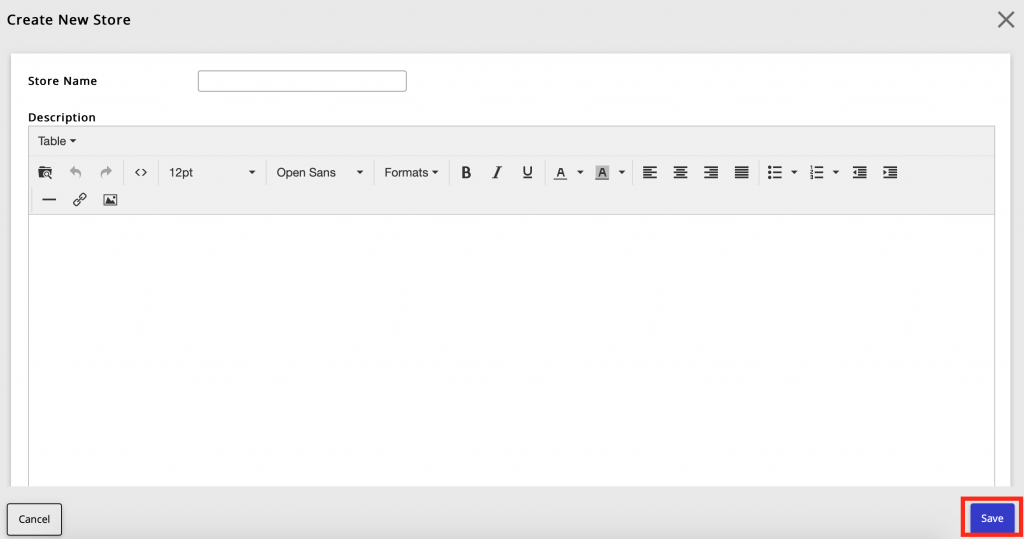
On the screen that pops up fill in the store name and a description (description is optional). Then Click the Save Button in the bottom right.
Edit a Store
To edit a store, Click Manage Stores on the Merchandise home page. Then Select the store you want to edit. This will take you straight to edit the store name or description
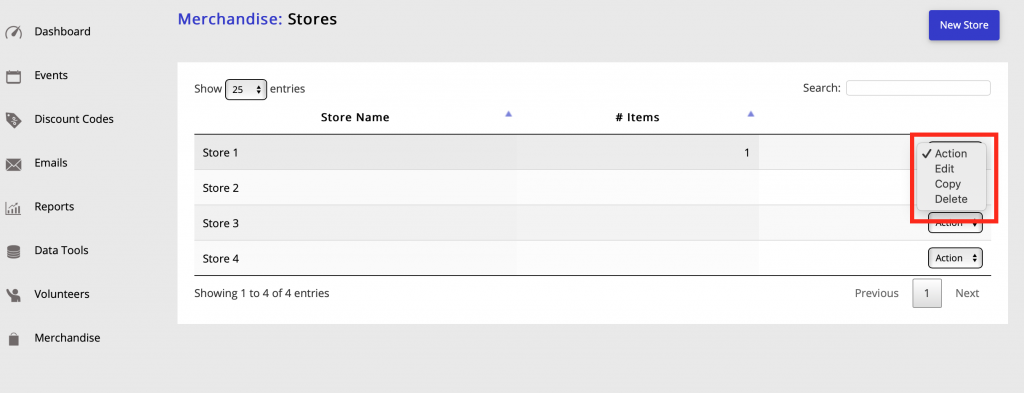
Use the Action Drop Down menu to the right of the store name to copy or delete a store. If you have similar store with the same merchandise items the copy feature can save you time
Add or Remove an Item to a Store
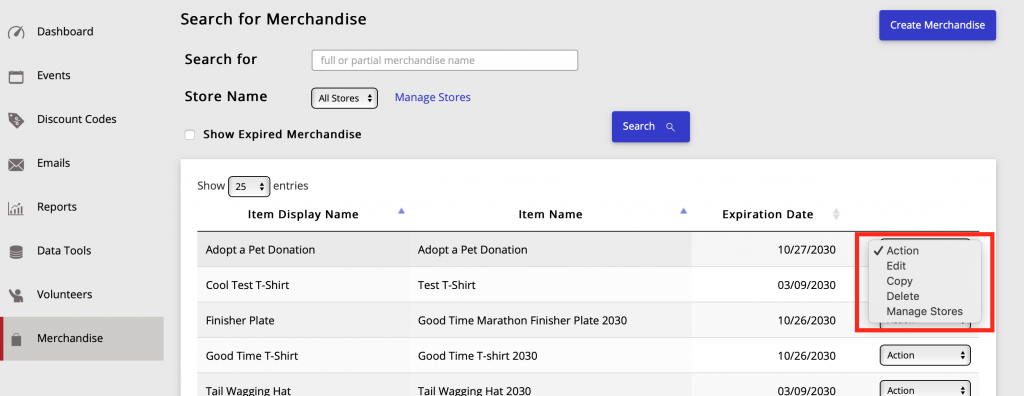
To add an item to a store, Select the item from the Merchandise home screen. Then Select Manage Store from the Action Drop Down Menu to the right of the item name.
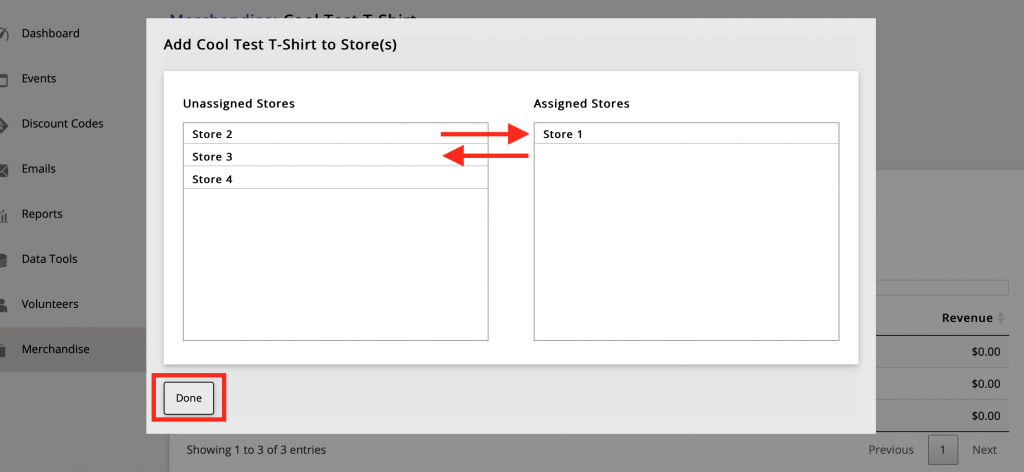
Click on the store you want to add or remove the item from.
ADD TO STORE: Click on a store from the Unassigned Store Column and it will move to the Assigned Store Column.
REMOVE A STORE: Click on a store from the Assigned Store Column. It will move the Unassigned Store Column.
You can also manage a store by clicking the item in the Merchandise Item Edit screen.