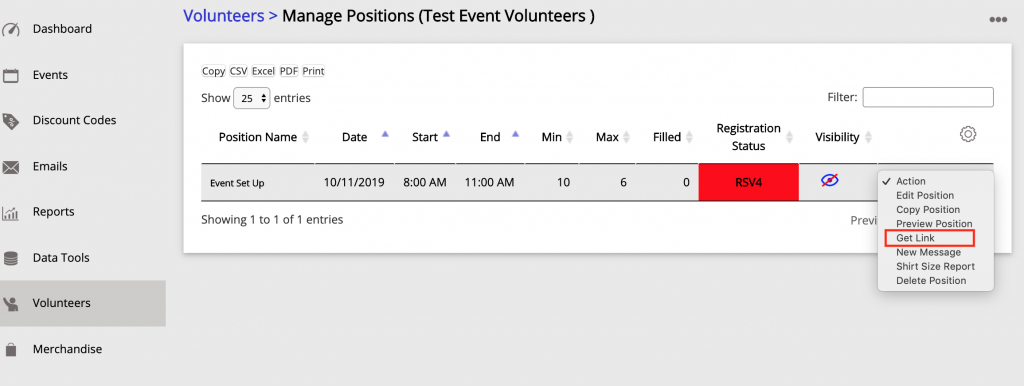
EventDog knows that volunteers are an integral part of your Event, and their experience is just as important as an event participant’s. That’s why we help you keep this portion of your Event organized and streamlined from sign up, to day of check-in.
The Volunteer Opportunity features allow you to set volunteer positions, set the number of volunteers at those positions, track the registration process for your volunteers, email your volunteers individually or as a whole position/event and day of check-in to assist you in event day operations.
Create a Volunteer Opportunity
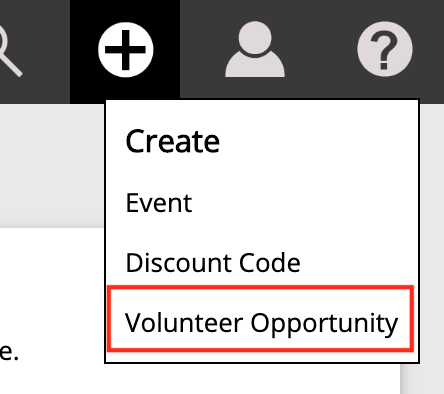
To create a volunteer opportunity Click on the Plus Sign at the top right of the page and Select Volunteer Opportunity from the create list.
This will take you to the Add Volunteer Opportunity page. On this page, you will create a name, attach the opportunity to the event, give shirt size options (if you will have shirts), upload a waiver, write a description of the opportunity and format a confirmation email to be sent to people who register to be a volunteer.
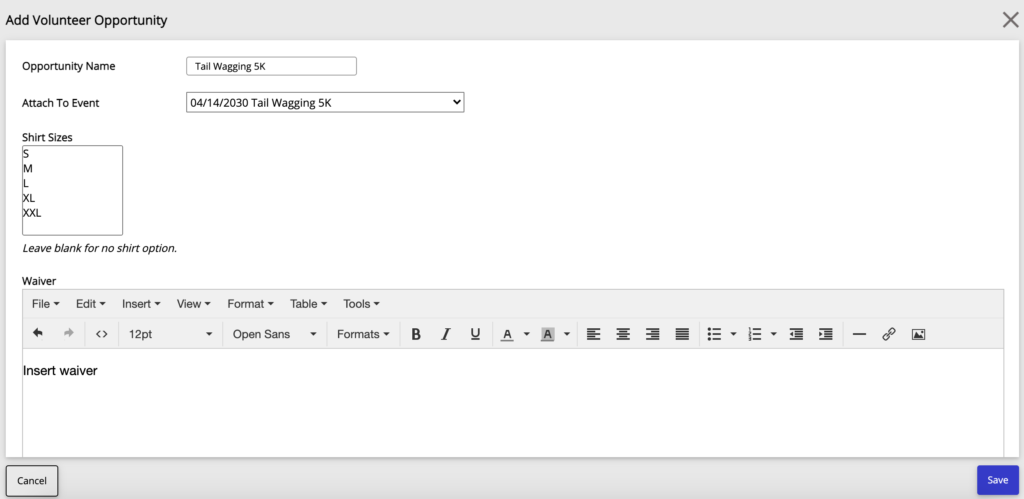
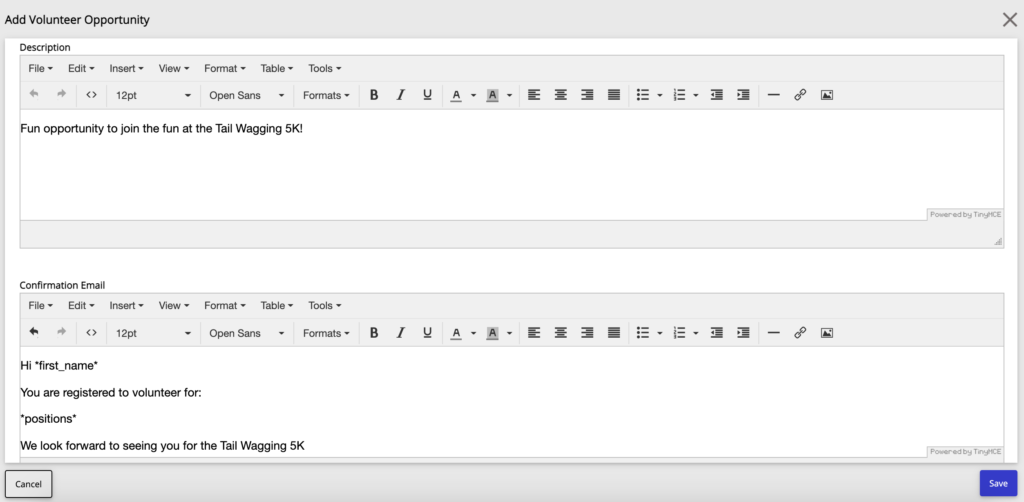
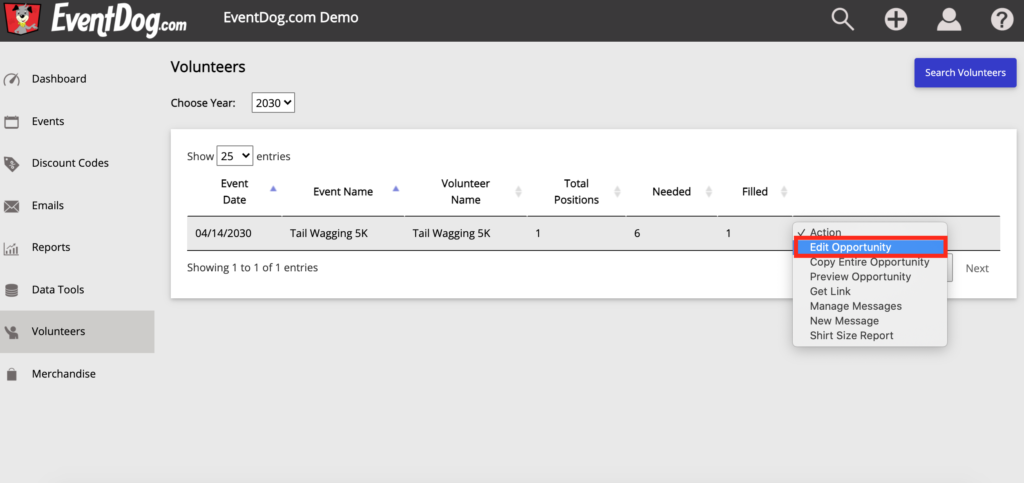
To go back and edit a volunteer opportunity description, waiver or confirmation email, Click on the Action Drop Down Menu, then Select Edit Opportunity. When finished editing, Click Save.
Adding Volunteer Positions
To add a volunteer position, first Select the Year of your event and Click on your Event. This will take you to the Volunteer Manage Positions page.
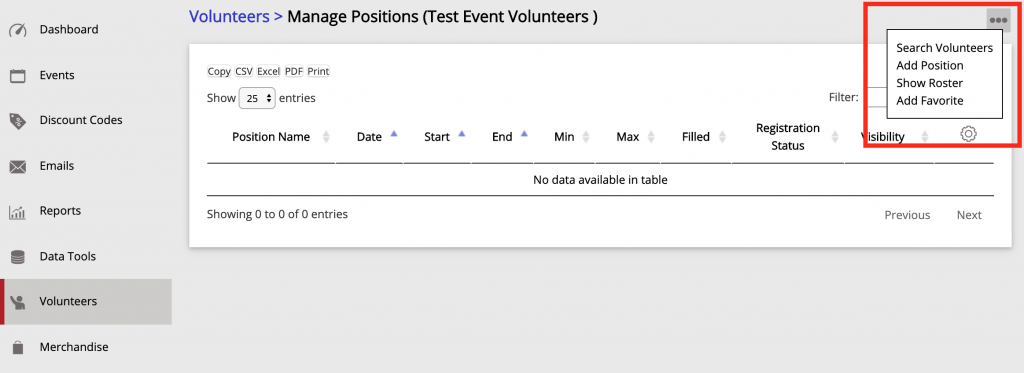
To add a position Click the three dot bar in the top right corner and Select Add Position. On the next page, you will add all the information for this position then Click Save.
Don’t Publish Feature
When creating the volunteer position there is an option to Check a “Don’t Publish” box. By checking this you will have created a volunteer position that will not show on the main registration page. The ONLY way to get to this opportunity will be through the page link.

