In EventDog, you can choose to transfer a participant to another activity within the current event they are registered for, or another activity in one of your organization’s other events.
First, search for a participant by Clicking on the Magnifying Glass in the upper right corner of the main tool bar. Once you have searched for your participant, Click on the Participant’s Name. This will take you to the participant information screen. From here there are blue buttons at the top. Click on the Transfer button.
Transfer Types
There are two types of transfers:
- Transfer to QuickReg
- This sends your participant an email to complete the registration to the activity you are transferring them to.
- Transfer to Autofill
- This will automatically take the answers from your participant’s current registration and autofill it to the registration of the activity you are transferring them to.
Transfer to QuickReg
Once you Select Transfer to QuickReg you will Choose which Activity you want to transfer the participant to. Next, you will decide if you are going to add a fee or submit the transfer without a fee. If the registration has any associated items you will be able to choose if those items will be transferred.
Adding a Fee to Transfer to QuickReg
To add a fee, Select the Checkbox next to “Add Transfer Fee” then Enter in the transfer fee amount. The processing fee will auto populate as well as the total the participant will pay. Finally, Click the Transfer button in the lower right hand corner.
The participant will pay the fee when they complete the new activity’s registration.
Transferring to QuickReg Without a Fee
If you are not adding a fee, Select the Activity you want to transfer to and Click the Transfer button in the lower right hand corner of the screen.
What Happens to Merchandise When the Registration is Transferred
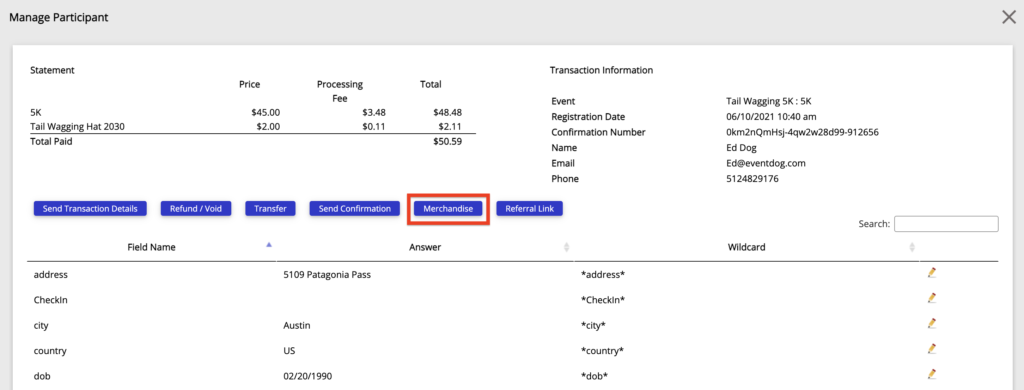
If you selected to transfer associated items, those items will transfer to the QuickReg for the new activity. Using the Merchandise button on the participant management screen you can view all merchandise attached to a registration.
On a transfer to QuickReg, the merchandise will show as void on the original transaction and will be valid on the QuickReg activity. To manage the participant’s transferred merchandise, you will use the QuickReg activity even when the QuickReg activity is completed.
What to Expect on Participant Management After Transfer
When the transfer to QuickReg has been submitted you will see the original activity registration is void and the QuickReg activity is paid. The QuickReg activity will show as the activity name you transferred the participant to. When you open the registration it will state QuickReg in the upper right as well as show only the participant’s basic information.
If a participant says they did not receive the email to complete the QuickReg you can resend this email from the QuickReg activity that shows paid.
Once the QuickReg is completed, it will show as void and a paid activity registration for the activity you transferred the participant to will show.
Recap: You will see 2 Void registrations and 1 Paid registration.
Transfer to Autofill
Once you have Selected to Transfer and Autofill Form, you will Choose which Activity you want to transfer the participant to.
When transferring to autofill you can select to send a receipt and confirmation email. This will send the participant a receipt of the transfer as well as the confirmation email (email they would have received if they registered themselves for the activity) of the activity they are transferred to.
You will decide if you are going to add a fee or submit the transfer without a fee. Finally, if the registration has any associated items you will be able to choose if those items will be transferred.
Adding a Fee to Transfer to Autofill
To add a fee, Select the Checkbox next to “Add Transfer Fee,” then Enter in the Transfer Fee amount. The processing fee will auto populate as well as the total the participant will pay.
With this type of transfer, the payment will be taken before submitting the transfer.
After the payment is taken, Click the Transfer button in the lower right hand corner.
Transferring to Autofill Without a Fee
If you are not adding a fee, Select the Activity you want to transfer to and Click the Transfer button in the lower right hand corner of the screen.
What Happens to Merchandise When the Registration is Transferred
If you selected to transfer associated items, those items will transfer to the new activity. Using the Merchandise button on the participant management screen you can view all merchandise attached to a registration.

On a transfer to autofill, the merchandise will show as void on the original transaction and will be valid on the new activity you transferred to. To manage the participant’s transferred merchandise, you will use the registration for the activity you transferred them to.
What to Expect on Participant Management After Transfer
When the transfer to autofill has been submitted you will see the original activity registration as void and the activity you transferred the participant to as a paid registration.
Recap: You will see 1 Void registration and 1 Paid registration.
Tracking Transferred Process
As an event organizer, you will be able to easily track which event a participant transferred to from their original transaction details.

From their new registration details you will be able to see where they transferred from.

To get to a participant’s details use the Magnifying Glass in the upper right hand corner of the screen. Once you find the participant, open their registration and look for “transfer” in the Field Name column.